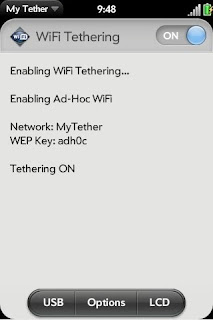
UPDATE NOV 9/10: Just thought I should add a note in here. The My Tether forums haven't heard anything from the creator in a long time, and have just become a large forum of spam. I would not recommend donating for this program, as I have no idea if you'll actually get access to the program. If you are still interested in getting a copy of My Tether, shoot me an email. Please see my more up to date post here.
We have a cottage in a park up in Grand Bend that we frequent in the summertime. For the last few years, we've been able to pick up an unprotected wifi signal from someone nearby, which we used on our laptop to check email, facebook etc. Unfortunately, this summer, the signal was gone and we were stuck up at the trailer with no internet access. I could do some stuff on my Palm Pre, but it is still no substitute for a laptop. This led me to researching "tethering" for my laptop and Pre.
Tethering is where you hook your cell phone up to your computer and use the 3G signal to gain internet access. Whether Bell allows this or not seems to be a grey area, from what I've read on multiple forums, but as of yet, no one claims to have been charged extra for doing it, so I decided to give it a try.
It didn't take long to discover the main way people are accomplishing this task is use a program called My Tether. They have a free edition, and a $10 donation edition. The paid version is simple to install, no different from a regular program or app. The free edition takes a bit of hacking to get installed. I decided to try the free edition, seeing as I'm cheap, and I felt capable of handling the work involved.
First Step: Bluetooth Connection
Now, although I said that My Tether is most common way to tether your Pre and computer, I did find some posts that state that since webOS 1.3.5.2 bluetooth tethering on the Pre has been enabled. I have an old bluetooth dongle, so I tried this method first. I didn't get very far, as no matter what I tried to do, my laptop and Pre would not sync. I suspect this had more to do with my old crappy bluetooth dongle than anything. After a couple hours of messing around with it, I gave up. On to the next step!
Step 2: Install My Tether
I got the instruction on how to install the free version of My Tether from this website.
I had no trouble getting through the rooting part, and installing My Tether on to my Pre. However, once I got rebooted and fired up the program, it simply wouldn't work. No matter what I did, the AoNet wifi server would not show up on my laptop. I triple checked all the steps, but could find nothing I had done wrong. Well, there's more than one way to skin a cat (so to speak). On to step 3!
Step 3: USB tethering
Wifi isn't the only way to connect with My Tether. You can also use it to connect via usb. In fact, forum posts on the My Tether website state that the usb connection is more stable and faster than the wifi.
Marco Picard posted this list of instructions on the My Tether forums. I went through MANY diffferent lists of instructions before I found this list, and it is what worked for me. Some of his steps varied quite a bit from what I had to do, so I've redone this list myself, but wanted to give Marco credit, since his list was the one that was closest to what I needed to do.
1. In My Tether on your Pre, turn on USBNet.
2. Reboot your Pre, open My Tether again and turn on DHCP. Make sure USBNet is still on.
3. Plug your in Pre to a USB slot on your computer.
4. If a wizard opens up, just close it. For me, no wizard started. My Pre connected normally. Choose "Just Charge".
5. Open up your Device Manager.
6. There should either be a "USB Ethernet Gadget" as Marco suggests, or "RNDIS Ethernet Gadget" as it came up on mine. Right click on it and select "update driver"
.
7. In the window that opens up, choose "Browse my computer for driver software"
8. On the next page, choose "Let me pick from a list of device drivers on my computer"
9. On the next page, choose "Network Adapter"
10. Under "Manufacturer", click "Microsoft Corporation". (Note: this is not the same as "Microsoft")
11. Choose "Remote NDIS based Internet Sharing Device.
12. Click Next. It will install the new driver.
That should be it. Once I went back to the Network Center, after about 30 seconds, it showed "Local Connection 2" to be connected to the internet! Success!
This a pretty complicated process, and from what I've seen, can have many different issues come up along the way. By all means, if you come across something other than what I've posted above, send me an email or leave a comment and I'll help you out as best I can. You could also try the My Tether Forums.
If I ever manage to find out why the wifi didn't work, and how to fix it, I'll update this post.
Good luck!

No comments:
Post a Comment
Note: Only a member of this blog may post a comment.